September’s Rate Drop: What FSBO Sellers and Buyers Need to Know

The Changing Market Landscape This Fall – HomeRise The Changing Market Landscape This Fall The real estate market could be in for a shake-up this September. Economists, analysts, and even prediction markets are signaling that the Federal Reserve will likely lower interest rates—something we haven’t seen in a while. While it’s only a possibility, a cut could ripple through mortgage rates, buyer demand, and home sale timelines. For FSBO (For Sale By Owner) sellers, this matters because demand is your fuel. If financing becomes cheaper, more buyers may be out searching—and with the right exposure through a flat fee MLS listing, you can tap into that energy without paying traditional commissions. For buyers, a more affordable rate could mean stretching your budget further, especially when paired with HomeRise’s cost-effective, tech-forward agent services. How Federal Rate Decisions Affect Real Estate The Federal Reserve doesn’t set mortgage rates directly, but it influences them through the federal funds rate. When that rate drops, borrowing across the economy often becomes cheaper, and mortgage lenders may follow suit. Historically, even a small decrease in rates has made a difference in how quickly homes sell and how much buyers can afford. That’s why sellers and buyers who are ready—or almost ready—should pay attention to the September meeting. Why September Is on Everyone’s Radar Financial heavyweights like J.P. Morgan and Goldman Sachs have updated their forecasts, now expecting the Fed to start cutting rates as early as September. Many believe a quarter-point cut could be the first in a series aimed at stimulating the economy. Market Intelligence Market pricing supports this view. Platforms like the Polymarket Fed Rates dashboard are showing strong probabilities that a September cut will happen. These numbers shift with new economic data, but the current odds are high enough to warrant attention from anyone making real estate decisions in the coming months. For FSBO Sellers Timing and exposure are key. A rate cut can bring more buyers into play, which means more eyes on your listing and potentially faster offers. For Buyers Lower rates mean more buying power. Even a small rate drop can save you thousands over the life of your loan. For FSBO Sellers: Timing and Exposure Are Key If you’re selling your home without an agent, the market’s momentum is especially important. A rate cut can bring more buyers into play, which means more eyes on your listing and potentially faster offers. By listing on the MLS with HomeRise’s flat fee service, your property appears alongside agent-listed homes in the same search results buyers are using—without the 5–6% commission. Even if rates don’t change, positioning your property on the MLS now means you’re visible when the fall market picks up. If a cut happens, you’ll already be in front of motivated buyers instead of rushing to list later. For Buyers: Affordable Financing Meets Modern Representation If rates drop, monthly payments on the same loan amount shrink, giving you more room in your budget. On a $350,000 mortgage, a 0.25% rate drop can save you $35–45 a month—or over $12,000 across 30 years. That’s real money you could put toward renovations, furnishings, or simply keeping your monthly expenses lower. HomeRise offers a modern, streamlined way to buy—combining the personalized guidance of an experienced agent with tech-enabled tools that make the process faster and more transparent. Best of all, our cost-effective commission model means you keep more of your money for what matters most to you. Should You Act Now or Wait? For sellers, waiting could mean hitting the market just as more buyers arrive, but it also risks missing the early movers who want to lock in before competition rises. For buyers, holding off could bring lower rates—but also more bidding wars. The smartest move is to get your ducks in a row now. Sellers can prepare their MLS listing, professional photos, and property details ahead of time. Buyers can get pre-approved, set search alerts, and be ready to move quickly if the right home appears. How HomeRise Puts You in Control HomeRise is built for people who want results without the outdated costs. For FSBO sellers, our flat fee MLS listings get you maximum exposure for a fraction of the price. For buyers, our modern representation model gives you expert guidance and the potential for rebates. When market conditions change—as they could in September—the people who save the most are the ones who combine smart timing with a smarter business model. That’s exactly what we offer. Get Started with HomeRise The Takeaway The September Fed meeting could be the start of a new chapter in the housing market. A rate cut may boost buyer activity and reshape affordability in ways that matter to both sellers and buyers. For FSBO sellers, this is the moment to ensure your home is on the MLS and ready to attract serious offers. For buyers, it’s a chance to lock in lower costs with the support of a cost-effective, modern agent. Keep an eye on the Polymarket Fed Rates dashboard for real-time updates, and start positioning yourself now. With HomeRise, you’ll be ready to act—and ready to save—whichever way the market turns.
8 Documents to Keep After Selling a Home

8 Documents to Keep After Selling a Home – HomeRise When you sell a home, keeping specific documents is essential for tax purposes, legal protection, and future reference. Here’s your complete guide to the key documents you should retain. 8 Key Documents You Should Retain: Closing Disclosure Statement: A detailed breakdown of all financial aspects of the sale, crucial for taxes and potential disputes. Deed of Sale: Confirms the transfer of ownership and protects against future disputes or fraud. Final Mortgage Payoff Statement: Proof that your mortgage is fully paid off, including any accrued interest and fees. Seller’s Disclosure Form: Outlines the property’s condition at the time of sale, ensuring transparency and legal compliance. IRS Form 1099-S: Reports the sale’s proceeds to the IRS, required for tax filing even if no taxes are owed. Property Tax Records: Proof of taxes paid, essential for audits or disputes with local authorities. HOA Documents (if applicable): Includes meeting minutes, fee payment records, and resale packages for compliance and dispute resolution. Home Warranty and Service Records: Covers warranties and maintenance history, useful for the new owner and potential claims. Quick Tips for Storage: Physical copies: Use a fireproof safe for originals. Digital backups: Scan and store securely in the cloud with encryption. How Long To Keep Documents After Selling A House? 1. Closing Disclosure Statement The Closing Disclosure Statement is like the financial roadmap of your home sale. This document meticulously outlines every dollar involved in the transaction, serving as your official receipt [3]. It lays out the final terms of your mortgage agreement, including the loan amount, interest rate, and monthly payment details [5]. It also breaks down all the charges negotiated during the process, such as fees, taxes, and escrow payments [4]. This detailed summary not only clarifies what you ow
How to Write Property Descriptions for SEO

How to Write Property Descriptions for SEO How to Write Property Descriptions for SEO Want your property listings to stand out online? Start with SEO. Optimizing property descriptions ensures they rank higher in search results, attract more qualified buyers, and drive better results. Here’s what you need to know: SEO is essential: Over 90% of buyers begin their home search on search engines, and organic traffic converts 25% better than paid ads. Keywords matter: Use terms like “3-bedroom home in Denver” to match what buyers are searching for. Long-tail keywords work best for targeting specific audiences. Local focus: Include location-specific terms (e.g., neighborhoods, landmarks) for better visibility in local searches. Mobile-friendly content: With over 60% of searches happening on mobile, keep descriptions concise and easy to read. Schema markup boosts visibility: Adding structured data ensures your listings appear as rich snippets, increasing clicks. Quick tip: Start descriptions with an engaging headline, highlight key features, and end with a clear call to action. Use U.S. formats for measurements and pricing to connect with American buyers. Ready to optimize your listings? Dive in for actionable tips. SEO Basics for Real Estate Listings What Is SEO and Why It Matters Search Engine Optimization (SEO) is all about making your online content more visible to people searching for it through organic search results [1]. Think of it as fine-tuning your property listings so they pop up when someone searches for terms like “3-bedroom home for sale in Denver” or “condos under $400,000 near downtown.” What makes SEO so powerful is its ability to connect you with buyers at the perfect moment – when they’re already looking for homes [2]. Unlike traditional ads that interrupt someone’s day, SEO works by meeting buyers where they are, right when they’re ready to make decisions. Google’s dominance in the search world makes this even more crucial. With 88.83% of the U.S. search market share [1], Google is where nearly nine out of ten searches happen. Optimizing for search engines essentially means optimizing for Google’s algorithm and how buyers naturally search for properties. Another reason to focus on SEO? Credibility. When your listings consistently show up at the top of search results, buyers start to see you as a trusted professional [2]. Organic visibility often feels more genuine than paid ads, which many users skip altogether. The numbers back this up. SEO leads convert at an impressive 14.6%, compared to just 1.7% for outbound leads [7]. Why? Because SEO captures buyers at the exact moment they’re ready to act – when they’re actively researching and comparing properties. Writing for U.S. Buyers Now that you understand the importance of SEO, it’s time to tailor your content to connect with U.S. buyers. Knowing your audience is key – they expect information to be straightforward, formatted in familiar ways, and aligned with their search habits. For example, using U.S. formatting like “$300,000” and “2,400 sq ft” signals to both buyers and search engines that your listings are relevant to the American market. Writing “2,400 sq ft” instead of “223 square meters” ensures your content speaks the language buyers are actually using in their searches. Another important consideration is the mobile-first nature of today’s market. Over 60% of real estate searches happen on mobile devices [4], and nearly half of all Google searches focus on local information [3]. Buyers scrolling through listings on their phones need clear, concise details without having to make mental conversions or guess what measurements mean. Beyond formatting, using location-specific language helps you stand out. Phrases like “modern villas for sale in Miami” [3] not only make it clear where your property is but also help search engines match your listing with the right audience. The effectiveness of localized strategies is clear. For example, in 2024, a campaign by Jennings Social Media & MarTech (JSMM) for the Miami Beach Visitor Center led to a 115% increase in qualified leads [5]. This success was driven by hyper-targeted content and performance-focused efforts. Finding and Using the Right Keywords Every successful property listing begins with understanding what potential buyers are searching for. Since most homebuyers start their journey online, knowing the exact phrases they type into Google is key to getting noticed. Put yourself in your ideal buyer’s shoes. Are you targeting first-time homebuyers looking for starter homes? Or maybe luxury buyers searching for high-end properties? Perhaps you’re appealing to investors seeking rental opportunities? Your keyword strategy needs to match the specific search habits of your audience. How to Research Keywords Keyword research tools can help you uncover what buyers are searching for and how competitive those terms are. Google Keyword Planner is a great starting point, offering data directly from Google Ads, including search volume and competition insights [6]. Popular Keyword Research Tools: Google Keyword Planner (Free): Great for basic research. Ubersuggest (Free): User-friendly for beginners and small teams. SEMrush (Paid): Ideal for SEO professionals looking for advanced insights. Ahrefs (Paid): Excellent for deep SEO audits and link analysis. Answer the Public (Free): Perfect for finding question-based keywords. For beginners, Ubersuggest is a solid choice, while advanced users might prefer the detailed analytics provided by SEMrush or Ahrefs. Focus on longer keywords rather than broad, generic terms. These specific phrases, like “affordable homes in Austin”, may have lower search volumes but often lead to better conversion rates compared to general terms like “Austin homes.” Kelly Sanchez, Content Marketing Manager at Sierra Interactive, emphasizes: “Optimizing for real estate keywords is a powerful way to increase your visibility, drive qualified traffic and grow your business” [6][7]. To refine your research, check Google’s “People Also Ask” section. This feature reveals common questions buyers have, helping you understand their concerns and tailor your content to address them [8]. Adding Local Keywords Local keywords are essential for real estate SEO since most buyers include location terms in their searches. Start by weaving city names, neighborhoods, and metro areas naturally into your titles and descriptions [7]. You can take it a step further by including school
5 Common MLS Listing Mistakes to Avoid

5 Common MLS Listing Mistakes to Avoid When listing your home on the MLS, simple mistakes can cost you time and money. Here are the five most common errors sellers make and how to avoid them: Overpricing Your Home: Setting an unrealistic price can scare off buyers and lead to longer market times. Homes priced right from the start often sell faster and for more money. Using Poor-Quality Photos: Listings with professional, high-quality photos attract more views and sell faster. Low-quality or too few photos can hurt your chances of selling. Incomplete or Incorrect Details: Missing or wrong information, like square footage or features, can confuse buyers and delay sales. Skipping Repairs or Disclosures: Failing to address known issues or disclose defects can lead to trust issues, legal problems, and reduced offers. Making Showings Inconvenient: Limited showing availability frustrates buyers and reduces interest, prolonging the sale process. Key takeaway: These mistakes are entirely avoidable with proper planning and attention to detail. Accurate pricing, professional photos, complete details, transparency, and flexible showings are critical for a successful sale. Top 5 Mistakes Home Sellers Make and How to Avoid Them 1. Setting the Price Too High Pricing your home too high is one of the biggest missteps you can make when listing it on the MLS. While it might seem like a good idea to aim high and leave room to negotiate, this approach often backfires in today’s real estate market, where buyers have access to detailed data and tools. Impact on Buyer Interest Today’s buyers are well-informed and have no trouble comparing home prices online. If your home is listed significantly higher than similar properties, buyers will quickly notice and move on to options that offer better value. “Even with limited inventory, buyers are savvy. They’re not going to jump on an overpriced home just because options are scarce. Instead, they’ll compare it to similar properties, spot the mismatch, and move on.” – Pete Evering, Utopia Management [6] Buyers rely on market data and comparable properties to make decisions. Homes priced at or slightly below market value tend to attract more attention and offers, while overpriced homes often sit unnoticed [5]. This disconnect in pricing not only discourages interest but also increases the likelihood of your home lingering on the market. Effect on Time on Market Overpricing often leads to extended time on the market. While the average home receives an offer in about 34 days [3], overpriced properties can take twice as long to sell [5]. The first two weeks after listing are critical for attracting serious buyers. If the price is too high, your home may be overlooked, setting off a chain reaction that slows down interest. Market Reality Check In November 2024, more than half (54.5%) of homes for sale sat on the market for 60 days or longer without receiving an offer [6]. That same month, the average time for homes to go under contract was 43 days – the slowest pace in five years [6]. Potential Financial Implications Overpricing doesn’t just delay the sale; it can also cost you money. Homes priced too high often take three times longer to sell and may ultimately sell for 10% or more below their true market value [4]. Frequent price cuts can also send the wrong message to buyers, signaling desperation and opening the door to lowball offers. Current data shows that only 36% of homes that experienced price reductions ended up selling, while about 34% of all homes on the market had price reductions since their original listing [8]. There’s also the issue of appraisals. Lenders base loan amounts on appraised values, not listing prices, so if your home is overpriced, it may appraise for less, leading to reduced sale prices or even canceled deals [7]. Ironically, trying to maximize profit with an inflated price often results in selling for less than if the home had been priced realistically from the start. 2. Using Low-Quality or Too Few Photos Accurate details can make or break an MLS listing, but high-quality photos are just as crucial. With about 85% of buyers relying on photos to judge a property’s appeal, poor-quality images or too few pictures can drastically hurt your chances of attracting interest. Impact on Buyer Interest Bad photos don’t just fail to impress – they can actively push buyers away. Data backs this up. Listings with professional photos receive up to 61% more views, while properties with fewer than nine photos tend to linger on the market twice as long [9] [11]. In fact, homes with fewer than nine pictures are 20% less likely to sell within 60 days compared to listings featuring 22–27 high-quality images [9]. Given that 97% of homebuyers were searching online as of 2020 [13], your listing photos are essentially your first – and sometimes only – chance to grab attention. Comprehensive visuals, like virtual tours, can nearly double engagement compared to listings without them [18]. Effect on Time on Market Good photos don’t just attract more views – they also help homes sell faster. High-quality visuals can cut market time by up to 32%, with well-photographed homes averaging 89 days on the market compared to over 120 days for listings with subpar images [17]. Specialized photography techniques amplify these results even further. For instance: HDR photography can help homes sell 50% faster and boost online views by 118% [10]. Drone or aerial photos shorten time on the market by 68% [10]. Listings with 3D tours spend about 31% less time on the market [19]. These faster sales often come with financial perks, too. Potential Financial Implications Professional-grade photography doesn’t just speed up sales – it can increase sale prices as well [15]. Homes with high-quality images typically command 47% higher asking prices per square foot and sell for 32% more than those with amateur photos [14] [18]. For properties priced between $200,000 and $1 million, using professional DSLR photography can result in sale prices that are $3,400 to $11,200 higher,
How to Boost Curb Appeal for Under $100
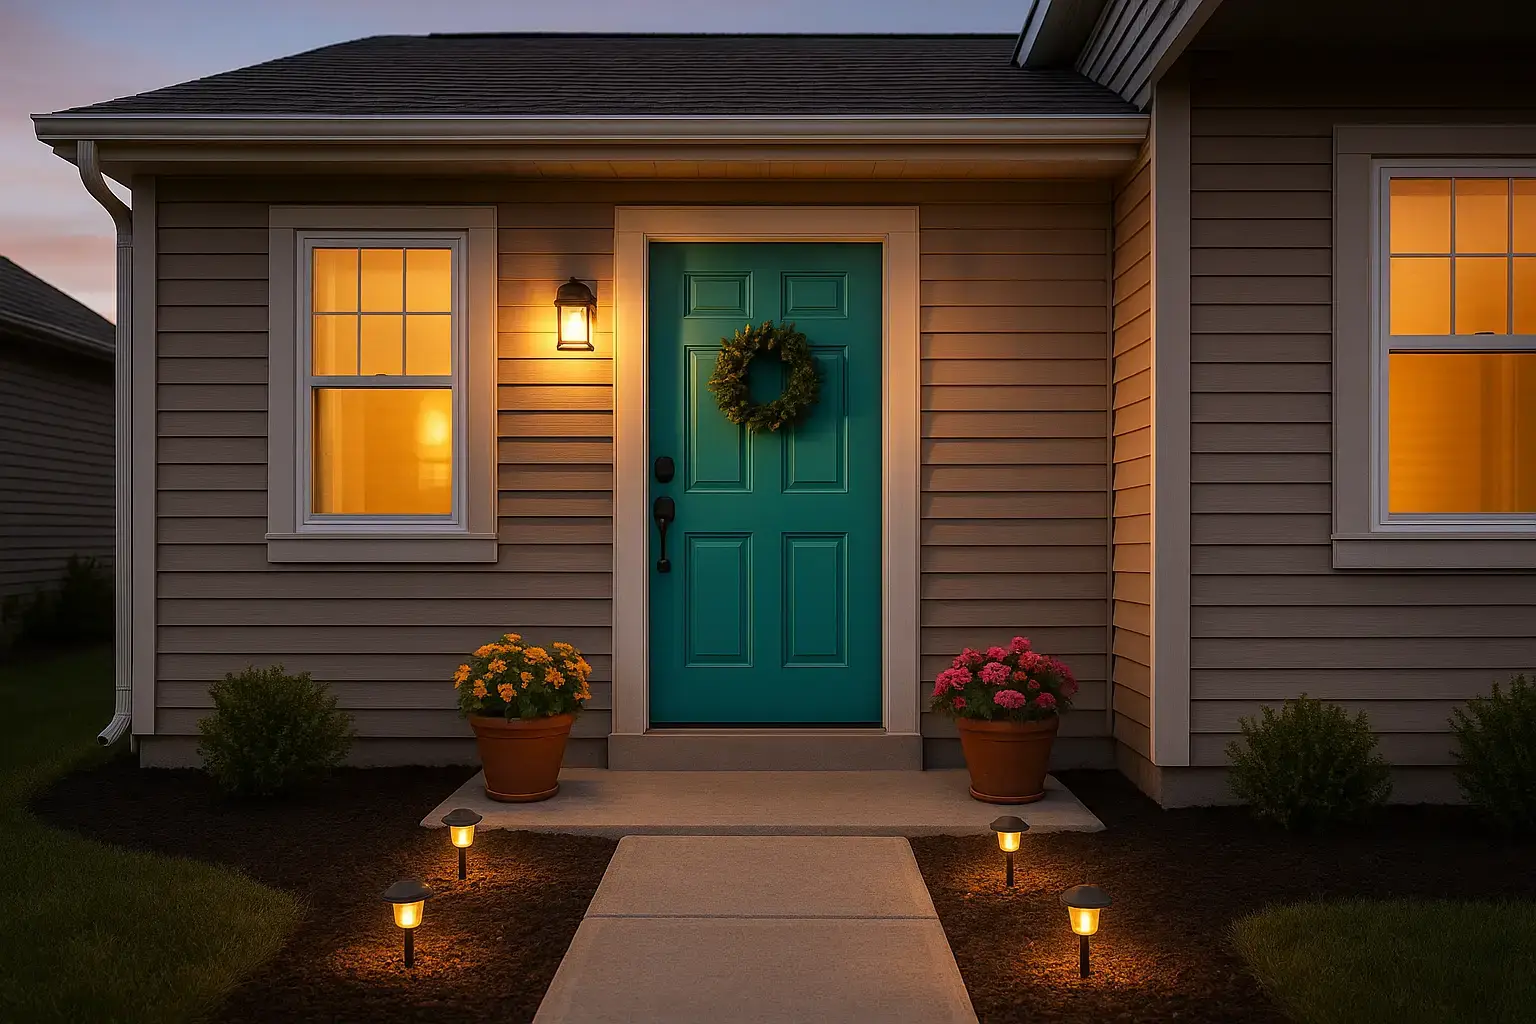
How to Boost Curb Appeal for Under $100 Improving your home’s curb appeal doesn’t have to cost a fortune. With a budget of $100 or less, you can make simple updates that create a strong first impression and increase your home’s value. Quick Wins for Maximum Impact Paint the Front Door: A fresh coat of exterior paint $20–$30 can instantly revitalize your entryway. Pressure Wash Surfaces: Rent a pressure washer for $30–$50 to clean walkways, siding, or driveways. Add Mulch: Fresh mulch costs $2–$6 per bag and adds a polished look to flower beds. Upgrade House Numbers and Mailbox: Modernize these small details for $25–$30. Install Solar Pathway Lights: A set of 12 costs about $30 and enhances evening curb appeal. Tidy the Lawn: Trim edges, mow, and plant low-cost flowers or shrubs to brighten up your yard. How To Add Curb Appeal on a Budget Evaluate Your Home’s Exterior Before spending a dime, take a step back – literally. Cross the street and look at your home the way a stranger might. This fresh perspective can reveal problem areas that may blend into the background during your daily routine. Snap a few photos of your home in daylight, making sure to avoid obstructions like parked cars or overhanging branches. Photos can highlight details you might miss with a quick glance and provide a handy reference as you plan improvements. Pro Tip Get input from friends, neighbors, or a real estate agent. A fresh set of eyes can often spot trouble areas you’ve grown accustomed to. Make a Visual Checklist Start by jotting down everything that needs attention. Work from the top down – inspect the roofline for peeling paint on trim or siding, check for sagging gutters, and note any cracked walkways or overgrown landscaping blocking windows or pathways. Focus on maintenance issues that might send the wrong message to buyers. Loose shutters, broken porch railings, or weathered siding can signal neglect. While these may seem minor on their own, together they can give the impression of a poorly maintained property. Find High-Impact Areas From your checklist, identify the spots that make the strongest first impression. The front door, windows, lawn, and walkway are typically the first things visitors notice, so they should be your top priorities. Key Focus Areas: • Front door and entryway – The centerpiece of your home’s exterior • Windows – Frame your home’s character and let in natural light • Lawn and landscaping – Set the stage for curb appeal • Walkway and driveway – Guide guests and create expectations • House numbers and mailbox – Small details with big impact Clean and Paint Key Areas Now that you’ve pinpointed the areas that need attention, it’s time to dive into some simple yet powerful upgrades. Cleaning and painting can dramatically refresh your home’s look without breaking the bank. Paint the Front Door or Trim Giving your front door a fresh coat of paint is one of the most affordable ways to make a big impact on your home’s appearance. A quart of high-quality exterior paint, which costs about $20–$30, can completely revamp the character of your entryway. “You want to use a high-quality exterior paint in a satin finish. The quality will allow for less fading, and the satin will allow for more washability and protection in a high-traffic area.” – Colin Nellis, Painting Professional[3] Preparation is key to getting professional results. Start by either removing or taping off the door hardware. Lightly sand the surface, and if needed, apply a primer before painting. Pressure Wash Surfaces Pressure washing is another simple yet impactful way to breathe new life into your home’s exterior. Renting a pressure washer for a day typically costs $30–$50, and the results are instant. Focus on areas like siding, walkways, driveways, and other concrete surfaces. Clean Windows and Gutters Sparkling windows can instantly make your home feel brighter and more inviting – no fancy tools required. Use a two-bucket system: one for soapy water and another for rinsing, which helps prevent streaks. Window Cleaning Tip Clean your windows on a cloudy day so the cleaning solution doesn’t dry too quickly, avoiding streaks. Budget-Friendly Landscaping Updates Once you’ve spruced up your home’s exterior surfaces, it’s time to focus on the landscape. Thoughtful, low-cost landscaping upgrades can tie everything together, giving your yard a polished, welcoming feel. Add New Mulch Fresh mulch is one of the easiest ways to give your yard a quick facelift without spending much. Economy bags of mulch typically cost between $2 and $6 each[5], making them ideal for smaller areas. For larger spaces, buying in bulk by the cubic yard (usually $20 to $60[4]) can save you money. Plant Low-Cost Flowers or Shrubs Adding vibrant flowers or shrubs is a simple way to brighten up your home’s exterior. Annual flowers like marigolds, zinnias, and cosmos are affordable, ranging from $2 to $15 per plant[4], and they provide a splash of color throughout the growing season. Trim and Edge the Lawn A tidy lawn with clean edges can make your entire property look more refined. Edging along sidewalks, driveways, and flower beds creates distinct boundaries that enhance the overall design. “A cost-free option to maintain a clean appearance and keep the grass in its place is to cut a 6-inch-deep line between the bed and grass with a spade or shovel. A small scoop shovel leaves the straightest edge. This process needs to be repeated two or three times a year.” – Jerry Goodspeed, Agriculture Professor at Utah State University[7] Add Simple Decorative Touches Once you’ve refreshed your landscape, it’s time to focus on the small details that truly make your home shine. These finishing touches are budget-friendly but can have a big impact on your home’s overall look. Update House Numbers and Mailbox Your house numbers and mailbox are among the first things people notice when they approach your home. A quick and affordable way to refresh your mailbox is by painting it. Supplies
How Local Trends Impact Home Pricing
How Local Trends Impact Home Pricing When selling your home, pricing it correctly is all about understanding local market trends. These trends, often more influential than national averages, can vary widely – even within the same city. Here’s what you need to know: Local Factors Matter Most: Economic conditions, nearby amenities, population growth, and crime rates directly affect home prices. For example, areas with strong job markets and low crime rates typically see higher demand and property values. Inventory Drives Prices: Low housing inventory often leads to bidding wars and higher prices. Conversely, an oversupply of homes gives buyers more negotiating power. Interest Rates Influence Demand: As of June 2025, 30-year mortgage rates averaged 6.84%. Higher rates reduce affordability, but demand remains steady in many areas. Seasonal Trends: Homes sell faster and at higher prices in the spring and early summer, with May 2023 seeing a 13.1% price premium on average. Key Metrics to Watch: Comparable sales, price per square foot, and days on market are crucial for pricing your home effectively. To avoid common pitfalls like overpricing or underpricing, sellers should rely on comparative market analysis (CMA) and real-time MLS data. Tools like HomeRise also help sellers navigate market complexities, offering options from basic MLS listings to full-service Realtor support. The bottom line: Local trends are the key to setting the right price and maximizing your home’s value. By focusing on recent sales, market conditions, and buyer preferences, you can position your home to sell faster and for the best possible price. How to Research Your Local Real Estate Market Understanding Local Market Trends Local market trends are the unique patterns that influence home values in specific areas. These trends can differ significantly, even between neighborhoods in the same city. Understanding these patterns gives sellers a leg up when setting a price, as local factors often have a more immediate effect than broader national trends. Let’s dive into what drives these trends and how they shape the housing market. What Are Local Trends Local trends are shaped by the specific factors that impact supply and demand in a given area. These include buyer demographics, the number of homes available, and the local economy [2]. For instance, population growth often increases housing demand [3]. Cities with thriving job markets, good schools, and appealing amenities tend to attract more people, which pushes up property values and encourages new construction [3]. The type of buyers also matters – young professionals may look for condos, while families might prioritize larger homes in suburban neighborhoods. The shift to remote work has added another layer, with many buyers now seeking homes that offer more space and dedicated office areas [2]. Inventory levels also play a critical role. When the number of available homes is low, it can lead to bidding wars and higher sale prices. Conversely, an oversupply of homes gives buyers the upper hand in negotiations. Important Data Points to Track Pricing a home effectively means keeping an eye on key market metrics that reveal the health and direction of the local market. Some of the most useful indicators include: Recent comparable sales: These show what similar homes in the area are selling for. Price per square foot: This metric standardizes pricing by dividing the sale price by the home’s square footage. Tracking it over time can reveal pricing trends. Days on market: This reflects how quickly homes are selling. For example, homes tend to sell faster during peak buying seasons (April to June), averaging 33 days on the market, compared to 49 days during slower months like December to February [4]. Other factors, like new construction and zoning changes, can signal shifts in future inventory. Monitoring building permits, planned developments, and city planning reports can provide clues about upcoming market changes [2]. Another useful metric is the absorption rate, which is calculated by dividing the number of homes sold in a month by the total inventory. A high absorption rate suggests a seller’s market, while a low rate indicates a buyer’s market. Seasonal and Economic Factors Seasonal patterns and local economic conditions also play a big role in shaping market trends. In the U.S., spring and early summer are typically the busiest times for home sales. Sales usually hit their lowest point in January and peak in June [4]. For example, from April to June 2023, an average of 16,530 existing homes were sold daily, compared to just 11,380 during the slower months of December through February [5]. This seasonal boost can be significant. In May 2023, homes sold for an average premium of 13.1% above market value [5]. Families often aim to move before the school year starts, and tax refunds during this time can help buyers with down payments [4]. Sellers can use these insights to strategically time their listings. Season Timing Avg. Existing Homes Sold Per Day Avg. New Homes Sold Per Day Median Days on Market Peak Buying April – June 16,530 2,000 33 days High Activity July – September 16,200 1,810 35 days Market Slows October – November 13,810 1,600 41 days Lowest Activity December – February 11,380 1,640 49 days Local economic conditions also have a major impact. A strong job market increases buying power and supports higher home prices, while economic downturns can cool the market quickly [6]. Keeping an eye on major employers, planned business expansions, and unemployment rates can provide valuable insights. Infrastructure projects like new transit systems, schools, or shopping centers can also shift demand in specific areas. Reviewing city planning reports and demographic studies can help identify neighborhoods poised for growth [3]. Finally, climate concerns are starting to influence buyer preferences. Homes in areas prone to flooding, wildfires, or other extreme weather events may see changes in demand as people become more cautious about climate risks [2]. This growing awareness is shaping long-term trends in property values. What Causes Home Price Changes Home prices are influenced by several key factors like inventory levels, interest rates, and local amenities. By
Home Selling Checklist: 12 Steps to Success
Home Selling Checklist: 12 Steps to Success Selling your home can be overwhelming, but breaking it into clear steps makes the process manageable and efficient. Here’s a comprehensive roadmap to help you navigate your home selling journey successfully. Quick Overview: Your 12-Step Success Plan Understand Your Finances: Calculate your mortgage balance, home equity, and closing costs to estimate your net proceeds. Research the Market: Study local sales, seasonal trends, and pricing strategies to set a competitive price. Organize Documents: Gather property records, tax details, warranties, and disclosures to streamline the sale. Prepare Your Home: Declutter, clean, and make minor repairs to attract buyers. Boost Curb Appeal: Maintain your yard, clean the exterior, and consider small upgrades like painting the front door. Set the Right Price: Use market data and comparisons to price your home accurately. Choose a Listing Service: Opt for a flat-fee MLS service for broad exposure without high commission fees. Create a Strong MLS Listing: Write a clear, engaging property description and include professional photos. Manage Showings: Keep your home clean, use scheduling tools, and gather feedback from potential buyers. Review Offers: Evaluate all terms, not just the price, and negotiate for the best deal. Handle Inspections and Appraisals: Prepare your home, address necessary repairs, and provide documentation to support the appraisal. Complete the Sale: Finalize paperwork, transfer utilities, and prepare the property for the new owners. Home Seller Checklist 2025: Avoid These Costly Mistakes Step 1: Check Your Financial Position Before putting your home on the market, it’s essential to take a close look at your financial situation. Understanding your mortgage balance, home value, and potential net proceeds will help you make informed decisions – whether it’s deciding on home improvements or setting a realistic listing price. Having accurate numbers upfront ensures there are no surprises down the road and lays the groundwork for everything from pricing to negotiations. Calculate Mortgage Balance and Home Equity Start by figuring out how much you still owe on your mortgage. You can find this information on your latest mortgage statement [2]. Next, get an estimate of your home’s current market value. Websites like Zillow.com can give you a rough idea, but these are just estimates. For a more precise figure, you might want to review recent sales of comparable homes in your neighborhood or even hire a professional appraiser [1]. Home Equity = Home’s Value – Mortgage Balance [1] It’s also worth understanding your loan-to-value (LTV) ratio. Many lenders use an LTV of 80% as a benchmark, meaning they generally prefer that homeowners have at least 20% equity in their homes. This ratio can influence your financial options as you prepare to sell [1][2]. Factor in Closing Costs Selling a home comes with expenses that will reduce your final proceeds, so it’s important to account for these. Seller closing costs typically fall between 6% and 10% of the sale price [3]. Closing costs can vary significantly depending on your location. For example, transfer taxes differ widely by area: Metro Area Transfer Tax Amount (Based on Median-Valued Home) Los Angeles, CA $5,748 San Francisco, CA $10,400 Seattle, WA $11,058 Houston, TX $0 – Texas does not have a transfer tax Philadelphia, PA $247 Washington, DC $6,076 Boston, MA $3,613 New York, NY $2,853 Nashville, TN $1,669 Denver, CO $597 In addition to transfer taxes, other common closing costs include title insurance, attorney fees, recording fees, and any unpaid property taxes or HOA dues. Use Financial Calculators To refine your estimates, online tools can be incredibly helpful. Calculators like Guild Mortgage’s “Home Sale and Net Proceeds Calculator” [4] and MortgageCalculator.org’s “Seller Closing Cost Calculator” [5] allow you to input specific details such as your estimated sale price, mortgage balance, closing costs, and agent fees. These tools can give you a clearer picture of how much you might take home after the sale. For the most accurate numbers, contact your lender to get the exact payoff amount, including any accrued interest or penalties. Taking the time to sort out your financial details now will make pricing decisions and future planning much easier. Step 2: Study Local Market Conditions Once you’ve assessed your financial situation, the next step is to dive into local market trends. Understanding your area’s market conditions will help you pick the best time to list your home and set a competitive price. This research is key to managing expectations and maximizing your home’s selling potential. Review Recent Home Sales Start by looking into recent home sales in your neighborhood to get a sense of current pricing trends. This will give you a clearer picture of what buyers are actually paying. Home sale data is usually public record, but how you access it depends on your location [6]. You can check local tax assessor websites, county records, or popular real estate platforms like Zillow, Realtor.com, or Redfin. If you have access to MLS data, that’s another great resource. However, in non-disclosure states like Texas, Alaska, and Montana, sales data isn’t typically public. In these cases, working with a real estate professional is highly recommended [6]. When analyzing recent sales, focus on homes similar to yours in size, age, and condition that sold within the last three to six months. Take note of how long they were on the market and whether they sold above or below the asking price. This will help you gauge buyer demand in your area. Check Seasonal Patterns Timing can make a big difference in how quickly your home sells and at what price. Understanding seasonal trends – both nationally and locally – can give you an edge. National Seasonal Trends Generally, the housing market heats up between April and June. Homes sold during this period often fetch higher prices, with May sales, for example, averaging a 13.1% premium above market value. Spring and summer are popular due to better weather, longer days, and schedules that align with school breaks and family moves [7]. Local Market Timing While national trends are helpful, local timing can vary.
Comparative Market Analysis: Step-by-Step Guide

Pricing your home correctly is critical for a successful sale. A Comparative Market Analysis (CMA) helps you determine your home’s value by comparing it to similar properties recently sold in your area. This data-driven approach ensures your price aligns with market trends, avoiding costly mistakes like overpricing or underpricing. Key Takeaways: What is a CMA? A CMA evaluates your home’s value by analyzing nearby, recently sold properties with similar features. Why it matters: Accurate pricing attracts buyers, reduces time on the market, and maximizes your return. Steps to create a CMA: Collect property details: Record size, features, renovations, and neighborhood factors like schools and amenities. Find comparable properties: Focus on homes sold within the last 3-6 months and in a similar location, size, and style. Adjust for differences: Account for variations like square footage, features, and condition to refine the valuation. Present a report: Compile your findings into a clear, professional document with pricing recommendations. A well-prepared CMA helps you set the right price, attract buyers, and confidently negotiate offers. Regularly update your analysis to stay aligned with changing market conditions. How To Do A Comparative Market Analysis On MLS? Step 1: Collect Key Property Information Before diving into comparisons with other homes on the market, you first need to build a detailed profile of your property. This step lays the groundwork for finding comparable homes and making precise value adjustments. By focusing on the features that matter most to buyers and the market, you’ll be ready to move on to selecting comparable properties. Record Property Features Start by jotting down the basics: total square footage (both finished and unfinished), number of bedrooms and bathrooms, lot size, and architectural style. Next, include the year the home was built, its current condition, any recent renovations, and any structural concerns. If the property has been used as a rental, make a note of that too – it can influence its market value. Pay attention to the quality of materials and finishes, such as flooring, countertops, cabinetry, and other high-end details. These elements can make a big difference when comparing your home to others with varying levels of quality. Don’t forget to list amenities like swimming pools, decks, finished basements, garage spaces, or energy-efficient upgrades like solar panels or a modern HVAC system. Highlight unique features as well – whether it’s a stunning golf course view, custom architectural details, or other standout characteristics. Examine Neighborhood Factors Knowing your home’s features is essential, but understanding the neighborhood can be just as critical. Buyers often weigh factors like schools, amenities, transportation, and overall community appeal when making decisions. Start with the school district. Research test scores, extracurricular programs, and teacher-to-student ratios. Homes near better schools can sell for 1-10% more, according to market data [2]. Next, look at proximity to key amenities like grocery stores, pharmacies, healthcare facilities, shopping centers, and restaurants. Homes near parks or outdoor recreation areas can command 8-20% higher prices [2], so be sure to include any nearby green spaces or trails. Transportation access is another key factor. Investigate public transit options, typical commute times to major job hubs, and your area’s walkability score. Properties within half a mile of public transit are, on average, worth 42% more [2], and homes near transit can see a value bump of up to 20% [3]. Explore broader market trends by looking at recent development projects, planned infrastructure upgrades, or major economic shifts. For instance, a new professional sports stadium can increase property values within a 2.5-mile radius by an average of $2,214 [3]. Lastly, research environmental and safety factors like crime rates, noise levels, air quality, and natural disaster risks. Also, take note of the overall condition and upkeep of neighboring properties – neighborhood aesthetics can significantly influence home values. Take time to observe your neighborhood’s community character. Look into local events, organizations, and even the demographic makeup. Strong community involvement and programs like neighborhood watch groups often signal safer, more desirable areas, which can boost property values. Step 2: Find and Select Comparable Properties (Comps) Now that you’ve gathered details about your property and its neighborhood, it’s time to identify recently sold homes that resemble yours. These “comps” are the foundation of your Comparative Market Analysis (CMA). The better your comps, the more accurate your valuation will be. How to Choose the Right Comps The best comps are homes that share key features with yours and were sold recently enough to reflect current market trends. Start by focusing on properties within the same subdivision or no more than half a mile away. If that doesn’t yield enough options, broaden your search to include homes in the same zip code and school district. Aim for comps that are within about ±10% of your home’s square footage. Also, try to match the number of bedrooms and bathrooms, as well as similar lot sizes and architectural styles. Timing is everything. Look for sales completed within the last three to six months to ensure the data reflects current market conditions. Older sales might not capture recent shifts in buyer preferences or seasonal trends. Another important factor is the age and condition of the homes. Select properties built around the same time as yours and note any renovations or updates that might affect their value. “Comparable sales should have similar physical and legal characteristics when compared to the subject property.” – Fannie Mae [5] Stick to three to ten well-matched comps. Having fewer, high-quality comps is far better than an overwhelming list of mediocre ones. Be cautious with unique situations, like distressed sales, as they may not represent true market value. Also, consider external factors such as flood zones or proximity to busy roads, as these can influence pricing. Once you’ve identified your comps, the next step is to adjust their values to account for differences between them and your property. Using the MLS and Tools Like HomeRise For the most reliable and up-to-date data on comparable sales, the Multiple Listing Service (MLS) is
The Ultimate Guide to Closing Costs for Sellers

The Ultimate Guide to Closing Costs for Sellers Master your home sale finances and keep more money in your pocket with strategic cost management When selling a home, closing costs can reduce your profit significantly – typically ranging from 6% to 10% of the sale price. For a $400,000 home, that’s between $24,000 and $40,000. These costs include real estate agent commissions, transfer taxes, title insurance, property taxes, and settlement fees. Knowing these expenses upfront helps you budget, negotiate, and keep more of your proceeds. Key Takeaways Agent Commissions: Often the largest cost, averaging 5%–6% of the sale price. Transfer Taxes: Varies by location, starting around $250 but can exceed $1,000. Title Insurance: Typically 0.1%–2% of the sale price. Settlement Fees: Range from 3%–6%, covering administrative tasks. Tips to Reduce Costs 1 Negotiate Agent Fees: Many sellers overlook this, but it can save thousands. 2 Shop for Title/Escrow Services: Comparing quotes can lead to better rates. 3 Review Closing Documents: Catch errors or unnecessary fees before finalizing. Pro Tip: Consider flat-fee MLS services or reduced commission options like HomeRise, which offers packages starting at $95 or a 1% agent network to maximize your savings. Seller Closing Costs Explained: Save $$$ By Doing This Main Types of Seller Closing Costs Knowing what to expect in closing costs can help you budget wisely and even find ways to cut back on expenses. Below, we’ll break down the primary costs sellers face at closing and highlight areas where you might be able to save. Real Estate Agent Commissions For most sellers, real estate agent commissions are the biggest closing cost, typically accounting for 5% to 6% of the home’s sale price. This fee is usually split between the listing agent and the buyer’s agent, with each receiving about 2.5% to 3%. $20,000 Average commission on $367,700 home 5.44% Current average commission rate 19% Sellers who negotiate lower rates To put this into perspective, on a home selling for $367,700 with the current average commission rate (5.44%), you’d pay around $20,000 in commissions. Combined with other fees, your total closing costs could reach 8–9% of the sale price. Recent changes by the National Association of Realtors (NAR) have shifted how commissions are handled. Buyer’s agent fees are no longer automatically included in the seller’s listing agreement, meaning buyers may now need to cover their agent’s commission themselves. Transfer Taxes and Title Insurance Transfer taxes and title insurance costs vary widely depending on where you live and your property’s value. Transfer taxes are government fees charged when property ownership changes hands. These fees typically start at around $250 but can climb to $1,000 or more depending on local laws. Cost Breakdown Examples NYC Transfer Tax 1% – 1.425% + 0.4% state fee Title Insurance 0.1% – 2% of sale price Title Search $75 – $200 Property Taxes and Settlement Fees You’ll also need to settle your portion of property taxes up to the closing date. For instance, if you close mid-year, you’ll owe taxes for the months you owned the home, while the buyer will take over from the closing date onward. Settlement fees, which cover administrative costs like document preparation and fund transfers, are another expense to account for. These fees are charged by title or escrow companies to manage the closing process. Shopping around can make a difference here. Many title and escrow companies are open to negotiating their fees, which can range from 3% to 6% of the home’s sale price. Comparing quotes from several providers could save you hundreds of dollars. How to Lower Your Closing Costs Closing costs don’t have to be a fixed expense. With the right strategies, you can reduce these fees and keep more of your earnings from the sale of your home. Here are three practical ways to cut down on closing costs. Negotiate Agent Commissions Did you know that real estate commissions aren’t set in stone? In fact, they’re legally required to be negotiable. Yet, only 22% of sellers actually manage to lower their fees. That means many homeowners miss out on a chance to save. “By law, real estate brokerage fees are negotiable.” – Rick Smith, Director of the California Association of Realtors Today’s market conditions work in your favor. Nearly half of agents (47%) expect buyer’s agent fees to decrease by 2025, and 34% believe listing commissions will also drop. According to Trent Seigfried, a Data Analyst at Clever Real Estate, “Current market conditions provide a great chance to negotiate commission rates”. Compare Title and Escrow Companies Shopping around for title and escrow services can save you hundreds – or even thousands – of dollars. Many sellers don’t realize they have a choice here, but the Real Estate Settlement Procedures Act (RESPA) gives you the right to select your own title company. Independent title companies often charge less than those affiliated with larger organizations. To find the best deal, request quotes from multiple providers. Don’t just focus on the base premiums – compare the total fees. Check Settlement Statements for Mistakes Your settlement statement is essentially a roadmap of your closing costs, and reviewing it carefully can save you from paying unnecessary fees. Make sure to go over the document at least 24 hours before your closing appointment. Look for duplicate charges, incorrect fees, or anything that seems off. Mistakes to Avoid When Handling Closing Costs Not Accounting for All Closing Costs Focusing solely on the obvious expenses can leave sellers blindsided by the full scope of closing costs. These unexpected costs can add up quickly, creating financial headaches. It’s easy to underestimate or forget about smaller fees, but these can create shortfalls at the closing table. Beyond major expenses like agent commissions, minor charges – such as transfer taxes or escrow fees – can pile up. Overlooking Opportunities to Negotiate Closing costs aren’t set in stone, and failing to negotiate can result in higher expenses. For example, comparing Loan Estimate forms from different lenders can help you identify and
5 Best Home Staging Tips That Actually Work

5 Best Home Staging Tips That Actually Work | HomeRise 5 Best Home Staging Tips That Actually Work Proven strategies to sell your home faster and for more money When selling your home, staging can make a huge difference in how fast it sells and for how much. Staged homes sell faster and often sell for 5–15% more. The good news? You don’t need to spend a fortune to stage effectively. 23 Days on market(staged homes) 184 Days on market(unstaged homes) 15% Higher sale price(potential increase) 1 Declutter and Depersonalize Create an open, inviting space where buyers can easily picture themselves living. Clear out clutter that makes rooms feel cramped and remove personal items that might distract buyers. The 80/20 Rule Keep your home about 80% furnished while leaving 20% of the space visually open for a cleaner, more spacious feel. Key Areas to Focus On: Kitchen countertops – store away appliances like toasters and food processors Bathrooms – remove personal items like toothbrushes and toiletries Bedrooms – swap personal photos for neutral artwork Storage spaces – organize closets and cabinets to showcase potential Cost: Minimal – primarily involves using what you already have with only small expenses for storage bins. 2 Deep Clean and Refresh A sparkling home not only leaves a great impression but also reassures buyers that the property has been well cared for. This step goes beyond your usual tidying routine. Impact on Sale Price Homes receiving professional cleaning sold for an average of 5% above asking price, while uncleaned homes sold for 3% below asking price. Priority Cleaning Areas: Kitchen appliances (inside and out) – refrigerator, oven, microwave Bathrooms – scrub toilet, polish fixtures, refresh grout lines Windows – clean inside and out to maximize natural light Carpets – vacuum thoroughly and remove stains Eliminate odors – 80% of buyers are turned off by strong smells Time Required: 3-7 days for a complete deep clean, depending on home size. 3 Optimize Furniture Layout Arrange your furniture to highlight the room’s potential and make spaces feel larger. A well-thought-out layout improves movement through the home and helps buyers imagine themselves living there. Professional Tip “You don’t want your house to look like a bowling alley, so stop placing everything against the wall.” – Shirin Sarikhani, Seattle Staged to Sell & Design Layout Guidelines: Float furniture slightly away from walls to create openness Maintain 36-inch pathways (42-48 inches in main hallways) Keep coffee tables 12-16 inches from sofas Arrange seating to encourage conversation Don’t block windows – emphasize natural light Cost: Free – simply rearrange what you already own. 4 Improve Lighting and Ambiance Proper lighting makes rooms look larger, highlights key features, and creates a warm, inviting atmosphere. Studies show people are 12% more likely to make purchases in well-lit spaces. LED Bulb Benefits LED bulbs are 90% more efficient than incandescent bulbs and can save up to $81.68 over their lifespan at just $4 per bulb. Lighting Strategy: Ambient lighting: General lighting for the entire room Task lighting: Focused lighting for specific areas Accent lighting: Decorative touches for architectural details Quick Improvements: Open curtains and clean windows to maximize natural light Install dimmer switches for flexibility Use warm-toned bulbs (2700-3000K) in living rooms Add under-cabinet lighting in kitchens Upgrade outdated fixtures Cost: Under $200 for most rooms with significant impact. 5 Boost Curb Appeal First impressions happen within 7-10 seconds of seeing your property. Homes with great curb appeal can sell for 7-14% more than similar properties, and 92% of Realtors recommend improving the exterior. Return on Investment Affordable curb appeal upgrades can increase perceived property value by 5-11% with minimal investment. High-Impact Improvements: Power wash exterior, walkways, and driveway Paint the front door and update hardware Keep lawn mowed and add fresh mulch Clean windows inside and out Add colorful flowers or potted plants Install modern house numbers and mailbox Budget-Friendly Costs: Exterior paint: ~$35 per gallon Light fixtures: Starting at $25 New mailbox: As low as $20 Time Required: Most projects can be completed in a weekend. DIY vs. Professional Staging Choosing between DIY and professional staging depends on your budget, time, and design skills. Both approaches can be effective when done properly. Factor DIY Staging Professional Staging Upfront Cost $200–$800 (paint, décor, accessories) $500–$1,500 per room Time Investment 2–4 weeks of personal effort 1–2 weeks with limited homeowner input Expertise Level Based on homeowner’s design skills Professional design and market insight Best For Smaller homes, budget-conscious sellers Larger homes, vacant properties, time-pressed sellers Frequently Asked Questions What are some affordable tips for staging my home effectively? Start with the basics: declutter and deep clean every room. A spotless, clutter-free space instantly feels more open and welcoming. Rearrange furniture to emphasize standout features like windows or fireplaces. Add mirrors to make rooms feel brighter and more spacious. Simple updates like fresh flowers, stylish throw pillows, or modern light fixtures can breathe new life into your space for minimal cost. What are the advantages of hiring a professional home stager? Professional home stagers know exactly how to emphasize your home’s best features, downplay flaws, and create a welcoming vibe that resonates with buyers. Their expertise often results in faster sales and higher offers. They bring an unbiased perspective and have access to modern furniture and décor that appeals to today’s buyers. Why is curb appeal important when selling a home? Curb appeal creates a crucial first impression within 7-10 seconds of buyers seeing your property. A tidy, welcoming exterior suggests the home has been well cared for, boosting perceived value. Simple improvements like landscaping, fresh paint, or updated fixtures can help your home sell faster and potentially for a better price. Ready to Stage Your Home? These proven staging strategies can help your home stand out in today’s competitive market. Whether you choose DIY or professional staging, the key is creating a space where buyers can imagine themselves living. Get Started Today